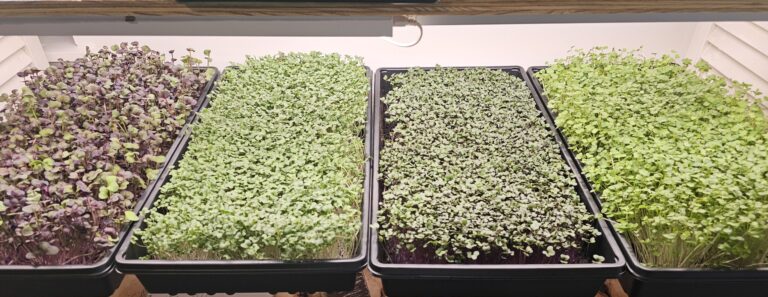
Finding the Sweet Spot: Watering Your Microgreens for Optimal Growth
Growing your own microgreens at home can be a gratifying experience. These nutrient-packed greens provide a boost of fresh flavor and crunch to dishes, and they’re surprisingly easy and quick to cultivate.
However, proper watering is essential to growing healthy, vibrant microgreens. Follow these key tips to find the sweet spot for watering your microgreens and reap a bountiful harvest in just 7-14 days.
First Sprouts Need Gentle Moisture
When you first plant your microgreen seeds, seed them on soil that has been tamped down slightly and is flat. You should then water them right away.
This initial watering helps the seeds begin to absorb moisture and penetrate down into the soil. Use a spray bottle or watering can with a gentle spout to lightly coat the soil without disturbing the seeds. Aim for moist, slightly saturated soil at this stage.
You are going to be covering the microgreens and it is best if they are left undisturbed for the 3 or 4 day germination period.
Bottom Water Once Sprouts Emerge
Once those first seedlings start peeking through the soil after 3-4 days, you’ll want to switch up your watering method.
Overhead watering can crush the delicate seedlings as well as lead to molding issues. For most microgreens you will find that it is better to water them from the bottom, this is why microgreens are commonly grown in a tray with holes that are nested inside of another tray.
To bottom water lift the tray containing the microgreens from its nest and pour about 1 cup of water into the bottom tray. Once you set the microgreen tray back down the water will begin to seep into the soil from the bottom. At the same time, the emerging roots will draw water from the moist soil below.
Let Soil Dry Slightly Between Waterings
Damping off is a common issue that causes microgreen seedlings to collapse and rot. It’s often caused by overwatering.
To prevent fungal diseases like damping off, allow the top layer of soil to dry out a bit between waterings once the sprouts are up.
Test with your finger – if the surface still feels moist, hold off. Aim for moist but not wet soil during this growth stage. err on the dry side rather than overdo it with water.
At most, you should be watering your microgreens no more than once per day to minimize the risk of damping off. Thicker canopies from overseeding can result in the need to use less water as well.
Increase Water as Plants Grow
As the microgreens grow and develop more robust leaves and roots, they’ll need more water. Expanding root systems draw more moisture from the soil.
Gradually add slightly more water each day as the plants get larger, though be sure to experiment with these on each type of plant as it will vary depending on their individual needs. Aim for moderately moist soil during the main growth stage.
Check the soil daily by lifting trays and gauging weight. Light trays need water, heavy saturated trays should be allowed to dry out before the next watering. An ideal moist soil will feel cool, damp, and dark in color. Lift the tray to check roots, by day 4 or 5 there should be signs of them peaking through the holes in the bottom of the tray – avoid waterlogging.
Water Early, Avoid Wet Leaves at Night
Always do your watering first thing in the morning if possible. This gives time for any moisture on the leaves to fully dry out in daytime heat.
Wet foliage overnight invites fungal diseases. Most fungal issues do not do well in light, so it is less likely to flourish during the daytime hours. If you must water later in the day, do so several hours before sundown so plants have time to dry.
Watering in the early morning is ideal as plants are replenished for a full day of growth. Just be sure to check soil moisture first – don’t water on autopilot!
Reduce Water Before Harvest for Intensified Flavor
On the last day before you plan to harvest your microgreens, cut back on watering. Possibly don’t even water at all within the last 24 hours. This should be considered on a plant-by-plant basis and what time you plan to harvest the following day.
The mild water stress intensifies the taste and preserves texture once harvested. This allows the greens to slowly become more concentrated in flavor as moisture is drawn down towards the roots. It also helps crisp them up for harvest and maintains this crisp for longer.
If you notice your plants starting to lay down you can give them a small amount of water, but avoid it if possible, if the greens are harvested with minimal water and then packaged they will last several weeks instead of just a few days.
Perfecting Your Water Routine
Getting your microgreens watering schedule dialed in takes some trial and error. So much depends on factors like temperature, humidity, airflow, and sunlight exposure.
Check soil moisture daily by lifting trays and touching the soil. With practice, you’ll learn when to mist, sprinkle, or deep water as well as how much water you need in each instance for your unique growing conditions. Aim for the sweet spot of evenly moist soil without oversaturating.
Your green thumbs will be rewarded with a bounty of hearty, flavorful microgreens.
Conclusion
Growing your own microgreens is an accessible way to add living flavor and crunch to meals year-round. These compact plants pack a nutritional punch, and a properly tended crop will thrive in a surprisingly small space.
Follow these key watering tips as your microgreens journey from seed to harvest. Stay attentive to their moisture needs at each stage of growth.
With a little care and consistency, you can master the art of watering for optimal microgreens every time. Thanks for visiting us here at TinyCropCo and be sure to check out our guide on proper seeding densities!

